Showing posts with label Pion Design. Show all posts

Sunday, 26 February 2017

Friends...

Happy Sunday everyone.

Sue here today with a card to hopefully turn our thoughts and the weather to spring!

This card was one of a set I made for our lovely Tracy for 
an issue of Die Cutting Essentials magazine which came out last year.

Thank you for popping by.
Happy Crafting

love from Sue...xxx

If you would like to know a bit more about how I made this card please feel free to visit me at 


Monday, 9 January 2017

A stitch in time...


Happy Monday everyone...

Sue here today with a sneak peek! 

This card is one of a set of five cards I made for our lovely Tracy for the latest issue of Die Cutting Essentials. They are all vintage inspired with wonderful sewing themed products from 
Dies To Die For
Thank you for popping by.
Happy Crafting

love from Sue...xxx

If you would like to know a bit more about how I made this card please feel free to visit me at 
tanglemouse cards

and....while your new 2017 calendars and diaries have lots of space in them be sure to check out our 
Dies To Die For Events Page
oh my - we have some fun planned for 2017!

Monday, 19 September 2016

Bellina Butterflies

Happy Monday everyone.
It's Sue here today sharing card full of DTDF gorgeousness.
This card is one of a set I made for Tracy for Die Cutting Essentials Magazine.
Something a bit different but such fun to make.
Thank you for popping by.
Happy Crafting
love from Sue...xxx

If you would like to know a bit more about how I made this card please feel free to visit me at 

Tuesday, 24 May 2016

Blooming Boots.............

Hi everyone!

Lou in with a quick make for you today because I couldn't resist having a go at the pleated fold for cards I had seen on a facebook page. They are seriously a whole tonne of fun so I am going to play some more in a few minutes!!

Hope you are all having a great day,
hugs Lou xxx

Wednesday, 12 August 2015

Shoreline Treasures Waterfall Folio

Hi everyone, I know I'm not usually here on a Wednesday, but I missed my Friday post due to my daughter's visit so I'll be sharing my project this Friday instead and I thought I'd share this additional project with you today.

This is a waterfall folio and it's super easy to make, you don't have to add a stamped and coloured image to it if you don't want to, you could easily use one of the fab images from the collection.

If you want to find out more about how to make one of these, just follow the link to my blog where I will share the tutorial I used.

I have a video of this project over on my blog.

Anyway, this is what I made.


All my edges are inked with Walnut Stain Distress Ink for a slightly vintage feel.


I used the following products on my make:

La-La Land Crafts Under the Sea Dies
(just released by La-La Land, should be in the shop soon)

That's all from me today, I hope you enjoyed my project and that it inspired you to make something yourself :) xx

Sunday, 5 July 2015

Vintage Wedding Album

Morning everyone, it's Linda here coming at you on a Sunday as the heat just wiped me out earlier in the week and so I wasn't quite ready to post this on Friday. Luckily for me I have wonderful teamies, and the super fabulous Faye (have you been following her work? It's amazing, I'm just a fan boy lol), stepped in for me and swapped days, isn't that sweet of her?

Anyhoo, on to my make and as you know I've recently been dabbling in some mini albums.......but now I've moved up into the next leave and so today I'm posting my first 'proper' mini album. (Well if I'm honest it it's actually the 3rd, but it's the 1st one I've shared)

I don't know about you but for me at this time of year it's all about Weddings. I've been asked to make several wedding cards and recently a work friend asked me to make a wedding album for her daughter to take as a gift for a wedding she was attending in Ireland. The bride likes vintage.

Immediately I thought of the Vintage Wedding collection by Pion Design, it fits the Vintage and Wedding theme and it has all these great cut aparts and tags etc. I used a mixture of 6 x 6 and 12 x 12 papers.

This is what I made.

I edged all of my layers (but not the pages themselves) with Walnut Stain Distress Ink. 


I hope I'm not blowing my own trumpet when I say that the pictures do not do it justice, it's so difficult to photograph these well,  and I have also made a video which you can find the link to on my blog, but it really does look lovely in real life and I'm rather chuffed with it.


The link to the tutorial I used is also on my  blog if you wish to have a go at making one of these for yourself.

Pion Design Vintage Wedding Collection
Other Items

I had an immense amount of fun making this and my work friend loves it, so I hope the bride and groom do too!

That's all from me today but I'll be back again next week in my regular Friday spot.

Happy crafting! :) xx

Friday, 19 June 2015

Cherry Blossom

Good morning!! Linda here to share some Friday inspiration with you.

 I made a card using an older Saturated Canary image from Little Darlings Rubber Stamps.

I've linked the items used at the end of my post.

This is Cherry Blossom, isn't she pretty?

Tracy has this stamp on sale, so if you want to pick up a bargain go snap it up while she still has stock left!


I coloured her up with my Distress Ink markers (and one Spectrum Aquatint marker) to match these pretty Pion papers.

Skin: Vintage Photo, Tattered Rose
Hair: Slate (SA), Black Soot
Clothing & Background: Bundled Sage, Slate (SA), Tattered Rose, Abandoned Coral, Gathered Twigs
I didn't stitch my layers this time because I did a lot of distressing on my papers, I really like the way it turned out.


Products Used

Dies to Die for

Well that's it from me today, but I'll be here, same time next week for our regular crafty date! :) xx

Friday, 15 May 2015

Vintage Wedding Mini Album

Happy Friday everyone, it's nearly the weekend...wheeee!
Linda here again for my regular Friday posting and I have something a little different for you today, it's not a card....don't faint now lol!

I've been messing about with a mini album using the new Maja collection, that's not quite ready to share yet, BUT while researching different styles of page, binding etc, I came across these really neat mini mini albums made from beer mats or drinks coasters.  Now if you don't have any of these you could just cut them from regular chipboard, but luckily for me I had a whole bunch of promotional ones sitting in a draw just waiting for me to be creative :P

As luck would have it Tracy had just sent me some of the gorgeous Vintage Wedding papers from Pion Design, so I made a sweet little wedding album. 


I've listed all the products from Dies to Die for at the end of my post.


If you want to see some more close ups of the pages, just visit my blog here.

I did want to try making a video to show you it properly, but I ran out of time to try, so hopefully I will upload the link that on my blog this weekend.


List of products used:

I'm really happy with the way this turned out, the photos really don't do it justice. Also it was so much FUN to make, you really should have a go, I already have the cutest baby beer mat mini nearly completed and I'm sure I'll make more because they really are easy and fun to make.

Right that's all from me today, sadly I'm stuck at work today, but it's the weekend soon and then I get to play ;)  Happy crafting! :) xx

Friday, 8 May 2015

Eva in Soft Colours

Happy Friday !!

Linda here and today I thought I'd share Eva again, I used her back in January and I used quite deep strong colours and I thought it might be fun to colour her again in a quite different style...well still MY style, but I thought it might be nice to go for much lighter softer colours etc to show the difference.


I used the beautiful Paris Fleamarket Collection from Pion Design, these are so yummy. I edges all my papers with Walnut Stain distress ink.

I coloured her with distress inks to match my papers. You can find those on my blog.

I cut out letters from the border sheet and popped them on some foam squares to make a little sentiment in a Scrapberry polymer frame, I used some Frantage over the frame for a nice effect.


I echoed the layout on the front inside the card, using one of the border strips to replace the lace and ribbon.

Items used:


That's all from me for today,  have a great weekend! :) xx


Wednesday, 11 March 2015

Vintage Paris Flea Market

Happy Wednesday! this card should really have gone live last Friday, but I was a little late though not being well and then when I got home from work I fell asleep and didn't get to post it!

As I hadn't been feeling well I wanted to make a card that wouldn't require colouring an image, so I chose these gorgeous papers from the new (ish) collection by Pion, 'Paris Flea Market'.

They are all so lovely I had a hard time deciding what I was going to use, but they also have a fabulous sheet of vintage images that are just perfect when you don't want to stamp and colour.

So I got out my ink, distressing tool, needle and thread and some gesso and distressed and shabbied everything up.

This is the result.


I've linked the products I've used at the end of the post.


Products used:


Well that's all from me today but I'll see you soon! :) xx

Saturday, 11 October 2014

Pion Vintage Garden

Good Morning Everyone
I hope you are having a good weekend.

My card today features some stunning papers from Pion Designs Vintage Garden collection. The image and sentiment are from the Vintage Garden Images sheet
The beautiful frame was made with a Whimsy Lace Corner die which I have trimmed and joined to fit.
The delicate butterfly is made by layering 2 Memory Box dies.


Items Used:


Thank you for stopping by to look at my card today.
Bye for now
Sue xx

Saturday, 27 September 2014

Pion Designs Iris

Good Morning Everyone
I hope you are having a good weekend.

It's Sue here today to share a simple card with you.
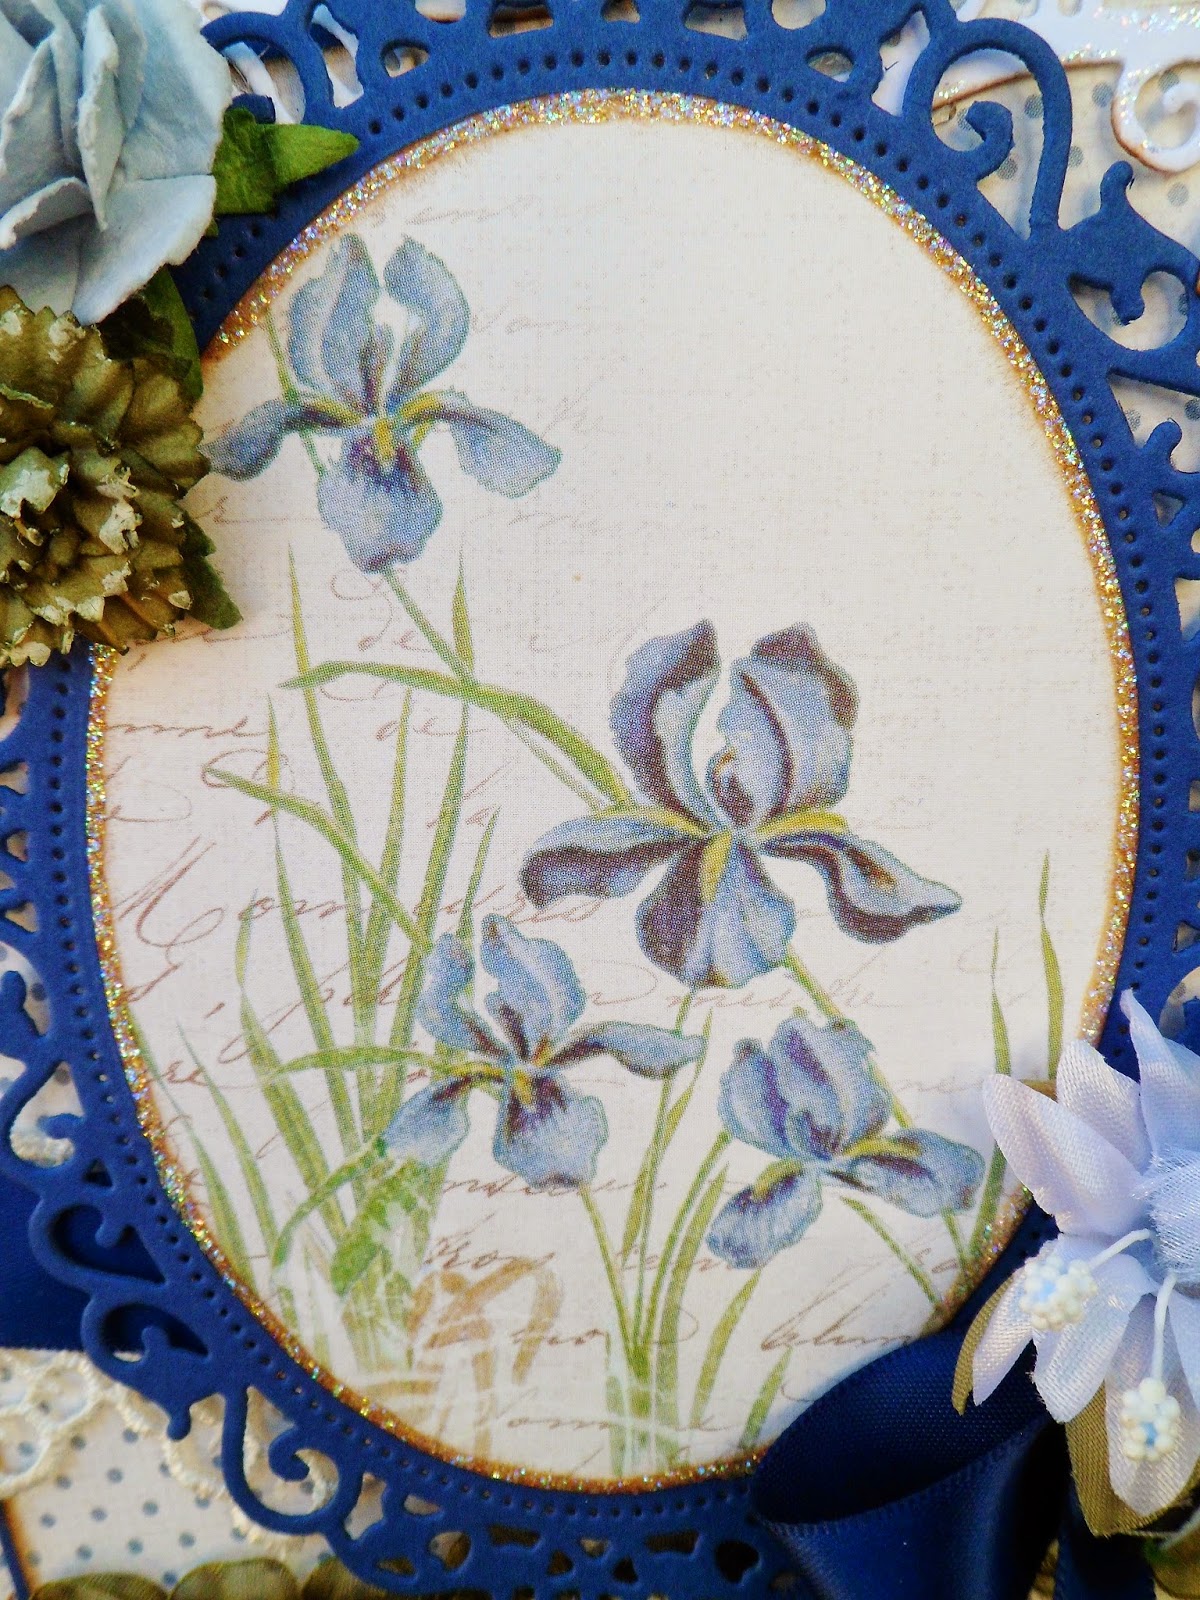
I have used the fabulous Whimsy Double Scallop die to make my card base. The beautiful iris image is cut from some stunning papers, Shoreline Treasures collection by Pion Designs the butterflies are from the Borders sheet.
I have stamped the sentiment using Memento London Fog ink and applied the same colour around the edge of the paper.


Items Used:

Thank you for stopping by to look at my card today
bye for now
Sue xx

Wednesday, 17 September 2014

Pion Design - My Precious Daughter

Hello everyone and happy Wednesday to you and I hope your week is going well so far.  

It's Ann-Marie popping in today to share a bit of crafting love with you all and for my make I couldn't resist playing again with Pion Design papers 'My Precious Daughter' I am smitten with these I really am.  I used mainly My Precious Daughter - Alma's Dress and a wee slice of My Precious Daughter - Baby Doll at the top of my card just to offset the stripes and a little border dividing them up with some ribbon woven through.  To set off the gorgeous image from the My Precious Daughter image sheet I used a Tonic Studios Butterfly Die 'Summer Azure' and whilst it was still in the die inked over with some Tim Holtz 'Walnut Stain' Distress ink to give it a little more definition and finished off with some 'Star Dust' Stickles.


Items Used


Okay time for me to go.  I hope you enjoy the rest of your week and manage to grab yourself some crafty time. 

Take care.
Ann-Marie 
xxx

Friday, 29 August 2014

Days of Winter

Happy Friday everyone! It's Linda here. Well I'm so glad that the weekend is almost with us, I've been struggling to shake off this cold all week, thought I'd got rid of it but it seems to be lingering so hopefully I can relax and shrug it off completely with some rest at the weekend.

Anyhooooo on to why I'm here and unusually for me my card does not have a stamped and coloured image, that's really rare for me, I do it from time to time but I think in a year of blogging this is only the 3rd time that my project does not have a hand coloured image on, but I was in need of saving some time as being ill had really put me behind with my makes.  Having said that, I really love the look of this vintage Christmas card and it was certainly a time saver, so you may well see more like this from me in the future, now and then.


As usual I  hand stitched my layers, I also distressed them and inked them with Walnut Stain DI.


The beautiful papers are the new Days of Winter collection from Pion Design.


There are links to products available in the store at the end of my post.


Products used


I do hope you like my share today, why not give it a try yourself?

Happy crafting! : ) x x

Friday, 22 August 2014

Happily Ever After - Again

Happy Friday everyone! It's Linda here.  If you're in the UK I hope you're looking forward to a lovely long 3 day weekend, so glad I no longer have to work bank holidays like a few years back.

Today I'm showing a wedding card that I made at the request of my daughter's friend, using Tiddly Inks' Happily Ever After ...and yes I know I've used this a few times now, but I actually don't have many 'wedding' or couple stamps and this stamp is on of my favourite images ever.


I used some lovely Pion Papers from the Flower Frame collection. I also paper pieced the brides Dress. All papers were edged with Distress Ink and then hand stitched. I coloured the stamp with distress inks (apart from a couple of Copics on the paper pieced dress), all the colours used and several more pics and all details can be found on my blog here.
 I finished her dress with a glue pen and some glamour dust to simulate sequins and beads.


I mounted the couple on a couple of Pierced Oval frames and slipped a couple of Heart Doily die cuts behind it. Can you spot the little love bird charm nestling beneath the flowers at the top right? I used one of the Fairy Tale Dreams sentiments and the matching die.


I decorated the inside with more of the same papers, the piece with the flower frame makes a lovely place to write a message.

Items used from the store:


Well that's all from me today, enjoy your weekend and I'll be back next Friday with some more inspiration to share :) xx

Wednesday, 13 August 2014

Pion Design - Shoreline Treasures

Hello everyone and a very happy Wednesday to you all.  It's Ann-Marie here as it's my turn to post something for you today.

Okay so you know when you have a card to make for someone and you're not quite sure what to do for them as you know they don't do girly and flowery and cute.  Well I had one of those I needed to make so here is what I came up with.

I know she likes her animals and her favourite colour is blue so what did I do I turned to Pion Design 'Shoreline Treasures' papers of course!! I used Shoreline Treasures 'Iris Sibirica' and 'Bottom of the Sea' and used my Spellbinders die to cut the image from a tag on the 'Shoreline Treasures Tags' sheet and layered them up using the dies and foam pads for depth.  I added some 'Western Eyelet Trim' ribbon to soften it a little together with some blue ribbon and a big bow.  It was missing just a little something when I put it all together so just added four My Mind's Eye 'Just Splendid' wooden dots which finished the card off lovely.


Items Used

Image:  Pion Design 'Shoreline Treasures Tags' sheet
Papers:  Pion Design Shoreline Treasures 'Iris Sibirica' and 'Bottom of the Sea'

Okay so that's all from me today, thank you for stopping by.

Take care, 
Ann-Marie 
xxx

Wednesday, 6 August 2014

Pion - My Precious Daughter

Hello everyone, Ann-Marie here with my usual Wednesday inspiration for you.

Well I really couldn't resist using these absolutely gorgeous Pion Design Precious Daughter papers again I am so smitten with them!  So what did I do with them well I decided I didn't want to just make a card so I made a little wall hanging from a 6 x 6 canvas I had lying around and which I thought would just go lovely in my daughter's bedroom.  Here's some piccies and the links to the goodies used:-


Items Used

Papers:  Pion Design - My Precious Daughter 'Alma's Dress' and 'Baby Doll'

Okay that's all from me today.  I hope you are having a fab Wednesday.

Take care.
Ann-Marie 
xxx


Wednesday, 16 July 2014

A little bit of Pion Design

Good morning folks, Ann-Marie popping in to wish you a very happy Wednesday and to share a little crafty inspiration with you all.

My card today has been made using some beautiful Pion Design papers.  I didn't use a stamped image but used the Pion Design 'Shoreline Treasures - Iris Sibirica' and cut out the iris from the paper with my Spellbinders die.  I also used Pion Design 'Shoreline Treasures - Seahorse' papers and matted them onto some blue card.  I used my favourite corner flourish Cheery Lynn 'Victorian Romance Flourish' I so love this die its just so pretty and also an Impression Obsession 'Love Birds' die and inked up the edges with Tim Holtz 'Walnut Stain' distress ink.  To add a little sparkle I added some glitter accents with 'Star Dust' Stickles.  Once I'd decided where everything was going this card didn't really take that long to make it was just a case of sticking everything into place.  I think I may give this one to my aunt for her birthday in a couple of days as blue is her favourite colour and all.


Items used


Right that's all from me today, enjoy your Wednesday folks.

Take care.
Ann-Marie 
xxx

Tuesday, 8 July 2014

Nurse Nightingale

Good morning!  It's Linda here again Tuesday has rolled around and I'm here with my regular weekly post and my 4th card of the week *phew!*

I needed to make a card for a friend at work who was leaving clinical teaching to go back into nursing.  I thought that Nurse Nightingale was perfect for this.  Sadly she's now out of stock, but the good news if you're a Kraftin' Kimmie fan, is that all Kraftin' Kimmie stamps in the store are all on sale and most are around half price!  Grab a bargain while they're still in stock!


I coloured her in Copics and paired her with the gorgeous Shoreline Treasures collection by Pion Design. These papers are so lovely and you can use many of them for more than just seaside or summer themes. I paired the Pion paper with some Kraft.

I've distressed all the edges of my paper and inked with DI in Walnut Stain and hand stitched as always with top stitch thread.


I fussy cut her out and popped her up on foam tape on a couple of sheets cut with a Die-namics Notebook Paper die. On top of that I've cut a couple of little banners with the smallest sizes of the Die-namics Jumbo Fishtail Banner Stax. The sentiment is from the Everyday Mini Postage Stamps sentiments by Whimsy and cut with the matching die.


The inside is decorated with the same paper range to complement the front...as you can see I wrote my message before remembering to take pics oops.
The wings at the top of the card are cut with the La-La Land Craft's Wings Set

A reminder of what I used from the store:

Distress Ink: Walnut Stain

Well that's it from me today, I'll see you again next week for some more crafty fun!  Take care :) xx