Showing posts with label heat embossing. Show all posts

Thursday, 20 January 2022

Big and Bold Winter Wishes Snowflake - Colorado Craft Company

Hello everyone,

I hope this week is being kind to you!

It's Sue here today to show you some Christmas cards (because I am never done with Christmas)!
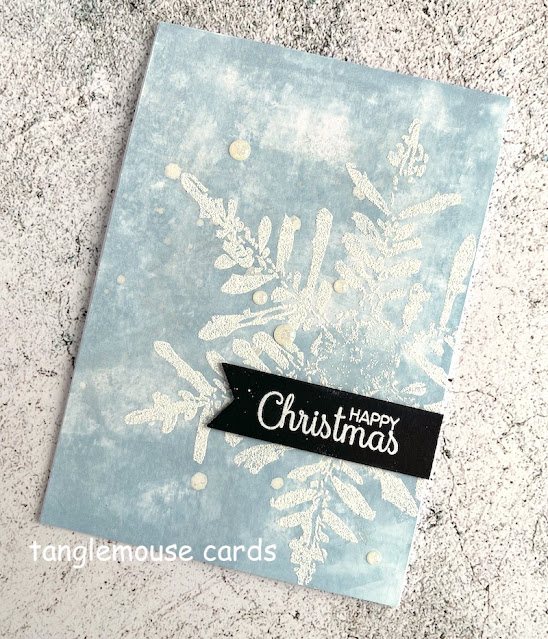
I absolutely loved making these.  The layout was inspired by Colorado Craft Company DT (BIG thanks to them for being amazing) - but for my cards, I created my own backgrounds and used some odd bits of old design paper.
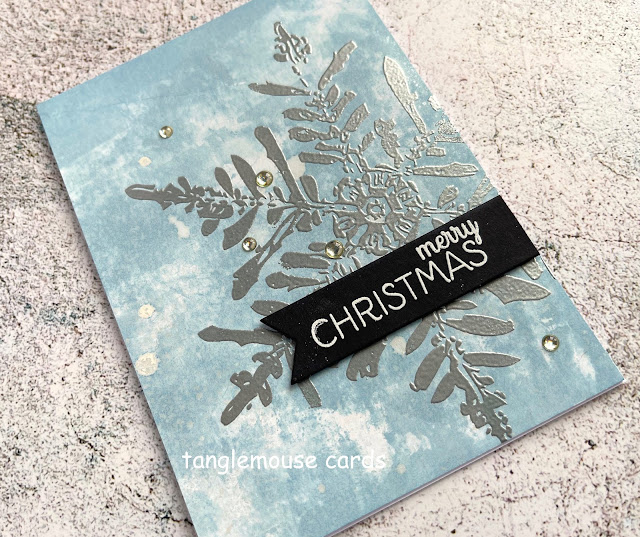
My favourite of this set was heat embossed in silver onto a background I created by using a brayer to add Stoneblue Catherine Pooler Ink onto card.  I then lightly splashed the card with white acrylic paint.

I finished the card by adding a white heat embossed sentiment on black card and some clear droplets.  (I cut little banners myself)
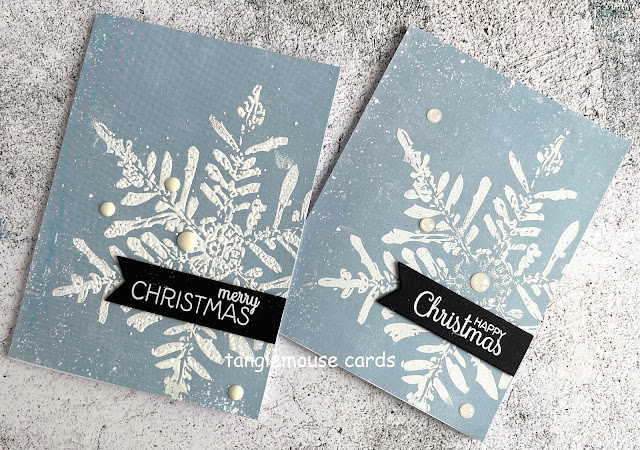
These two are stamped onto a rather ancient piece of design paper - I knew I kept it for a reason! 
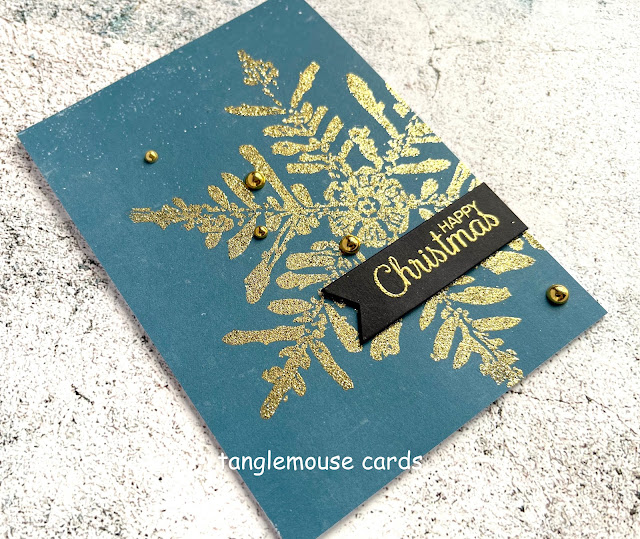
...and to mix it up a bit I stamped this one onto another senior piece of design paper and heat embossed it in glittery gold embossing powder, finally adding some gorgeous gold droplets.

Ingredients from Dies To Die For
Colorado Craft Company Big and Bold Winter Wishes Snowflake
Catherine Pooler Stone Blue Ink Pad
as and alternative you could use 
which have both gold, white and clear drops!

Thank you for popping by today!  happy creating
from Sue...xxx
Other Ingredients
White Acrylic Paint
WOW Slow drying Embossing Pad
WOW White, Silver, Gold Glitter Embossing Powder
Black Cardstock 


Thursday, 9 December 2021

Champagne Slimline Papers - Whimsy Stamps

Hello friends...

Sue here today to show you couple of cards made with a gorgeous new slimline paper pack.
 by Whimsy Stamps which is in store now!
I randomly stamped and heat embossed some snowflakes from the 
Whimsy Stamps Snow Flurries Clear Stamps Set
over a piece of the gorgeous design paper.

I then trimmed the paper slightly and layered it onto a piece of glitter card and then a piece of white card.

I then stamped in grey a sentiment from my current favourite set - 
Merry Christmas Clear Stamps

...and finished the card off by adding some bling to the snowflake centres and rounding the bottom corners of the card.

Just in case it's helpful - the finished card measures 20cm x 10.5cm.

These cards were so straightforward to create and I'm really happy with how they look.

They are another ideal card to make if you need several and are a bit short on time! 
Ingredients From Dies To Die For
I used Whimsy Stamps Snow Flurries which is currently out of stock but you would get a lovely effect by using the Colorado Craft Company Big and Bold Nordic Snowflakes

Thank you for popping by today!
Look after yourselves and - Happy Crafting!...
from Sue...xxx


**NEW Slimline Paper Pack - Champagne - Whimsy Stamps  *NEW Sentiment Assortment - Merry Christmas Clear Stamps - Whimsy Stamps 


Other Ingredients
WOW Embossing Slow Drying Embossing Pad
WOW Gold Embossing Powder
Glitter Card
WOW Pewter Embossing Powder
300gsm White Card


Thursday, 4 November 2021

Quick Christmas Cards with Whimsy Stamps Vintage Poinsettia Stamp Set

 Happy Thursday friends!

If you are anything like me then despite your best intentions you end up doing nearly everything at the last minute!

I've always been the same - I'm approaching my sixth decade - and there ain't no way I'm likely to change the habit of a lifetime!  (:  

To save me (a bit) from flying by the seat of my pants I have designed a set of Christmas cards which are incredibly straightforward and more importantly quick to make. 
I used my current favourite stamp set
Whimsy Stamps

I created a set of smallish (10cm x 10cm square) cards in a variety of bold colours with the beautiful poinsettia stamped heat embossed in gold.

I added a stamped and die cut sentiment and finished the card off with a few gold sequins.

...truly simples! 
Ingredients from Dies To Die For

Thank you for visiting today, take care of yourselves and have  a super weekend!
from Sue...xxx


**NEW Vintage Poinsettia Clear Stamps Quick Strips Die Set - Whimsy Stamps

Other Ingredients
WOW Embossing Slow Drying Embossing Pad
WOW Gold Embossing Powder
Gemini Jnr Die Cutting Machine

Thursday, 28 October 2021

Whimsy Stamps - Decorate a Tree Dies Set and Santa's Sleigh ATC Stamps

 Hello everyone,
I hope this week is being kind to you!

Today's card was a lot of inky fun!
I had an idea in my head when I started this card - you know how that turns out - right???
Anyway, I was pretty happy with the result in the end!

I used a couple of lovely new Whimsy Stamps products to make this card teamed up with a Slimline Die from last Christmas

First though I created some inky backgrounds to die cut the trees from with a selection of green Distress Oxides, water and mica powder.  I'll pop a link to a tutorial at the end of this post showing how I make my backgrounds.

The card background and the frame are created in the same way but with only one ink colour - Tumbled Glass.

I stamped and heat embossed in silver the gorgeous ATC Sleigh Ride Stamp

The card was put together as shown in the pic...
Ingredients From Dies To Die For

Thank you for popping by today - look after yourselves and....
Happy creating
from Sue...xxx

**NEW Decorate a Tree Die Set **NEW ATC Sleigh Ride Clear Stamps Slimline Scenic Countryside Die - Whimsy Stamps


Other Ingredients
Strathmore Bristol Smooth Vellum Card
Tumbled Glass, Twisted Citron, Peacock Feathers, Evergreen Bough
White Acrylic Paint
Honey Doo Crafts White Opal Mica Powder
Distress Splatter Brush
WOW Embossing Slow Drying Embossing Pad
WOW Silver Embossing Powder
300gsm White Card
Gemini Jnr Die Cutting Machine

Follow the link
for my inky background tutorial! 


Thursday, 14 May 2020

Oopsie!...

Hello everyone, 

It's Sue here today.

I'm wishing you all a super day, even if the days are a little odd right now!

I have a cute card to show you today, from a Whimsy Stamps April New Release stamp set that is just so fabulous it just keeps selling out!

This was such a fun card to make.

I first blended blue ink (Tumbled Glass Distress Oxide) over a piece of smooth card and then stamped the brilliant
onto it and heat embossed it in white.

I then trimmed the background into a 13cm square and set it aside.

Next I stamped one of the hippo's and the bucket & spade onto a piece of white card and coloured them with Copics
Hippo - T5, T3, T1, R11, BG0000, BG10
Reds - R59, R46, R27, R14
Blue/Greens - BG09, BG49, BG45, BG32
Sand - E37, E35, E33, E31

Then I cut the images out and put them to one side. 

I created a 10cm by 13cm rectangle of white card and ice cut a square aperture  in the top half of it as shown

I fixed the rectangle to the illusions background with foam tape and stamped the oopsie sentiment in black onto the bottom right hand corner.

Finally I fixed the cheeky hippo and the bucket and spade to the card design with foam tape as shown.
Be sure to have a look around our
to see the gorgeous DT creations there and then to 
to engage in some essential retail therapy!
Thank you for popping by today!

I hope you are all managing to stay safe and healthy in these uncertain and worrying times!

Happy Crafting
From Sue…xxx

*NEW Hippo Fun in the Sun Clear Stamps - Whimsy Stamps Illusions Background Rubber Cling Stamp - Whimsy Stamps
Crafty Foam Tape White - Whimsy Stamps

Monday, 22 April 2019

Forever Happy...

Happy Easter everyone! 
Hope you've had a lovely weekend!

I might have fallen a teensy bit in love with heat embossing!
This card is made by blending distress inks in
Worn Lipstick
 Scattered Straw, Evergreen Bough and Shaded Lilac on card and then die cutting it with a Notched Square Die

I then heat embossed the image with the 
using an embossing pad and powder

I then added a die cut 
and stamped the forever sentiment from
with black ink, die cutting it with a
Quick Strips Die

Ingredients From Dies To Die For
Stamps - Delightful Daisies Background Stamp 
You're Too Kind Clear Stamp Set
Dies - Notched Square Die
Happy Large Word Die
Quick Strips Die

Thank you for popping by!

Be sure to have a look around our
to see the gorgeous DT creations here and then to 
to engage in some essential retail therapy!

...and if you want to see bit more about this card and some other's like it then have a quick peek at my blog
HERE

love from Sue...xxx

Monday, 15 April 2019

Special memories...

Hello everyone,

I hope it's a happy Monday!

Here's something a little different from me which I really enjoyed making!
I made this card by die cutting a 
card blank and card design background.

I heat embossed the circle with the 
using an embossing Pad and embossing Powder.
I fixed this to the card blank and set it aside.

Next I 
heat embossed the 
Beaucoup Bouquet Clear Stamps 
on vellum.

The flowers were cut out with the matching
Beaucoup Bouquet Die Set

I coloured the reverse of the flowers with Copics, R35, RV95, Y38, YG67 and fixed them to the card design as shown.

I added a 
Special Large Word Die cut
and stamped the memories sentiment from the 
You're My Jolly Clear Stamp Set 
onto a 
Quick Strips Die cut.
Ingredients from Dies To Die For


Thank you for popping by!

Be sure to have a look around our
to see the gorgeous DT creations here and then to 
to engage in some essential retail therapy!

...and if you want to see bit more about this card and some other's like it then have a quick peek at my blog
HERE

love from Sue...xxx